
DIY: Build this Rustic Farmhouse Wood Box Centerpiece for Under $11!
Here’s a fun and inexpensive centerpiece idea!
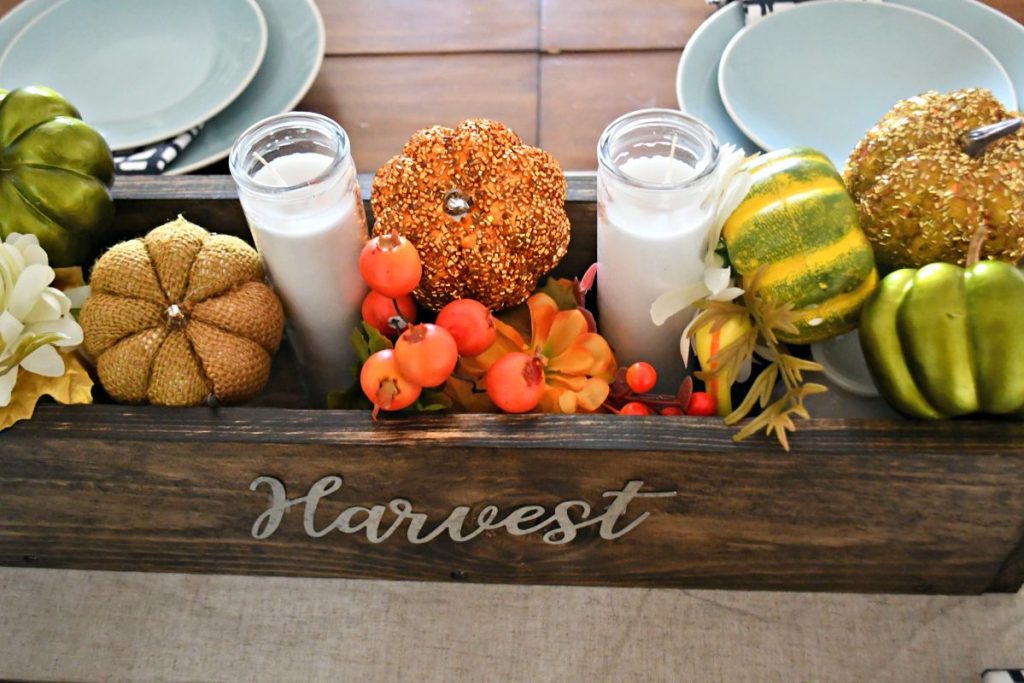
Dress up your tabletop with this cute and stylish rustic farmhouse DIY wood box centerpiece! Then fill it with accessories like Mason jars, flowers, and seasonal items. I love the look of the stained wood, but you can easily paint or stain it in any color to personalize your space at home.

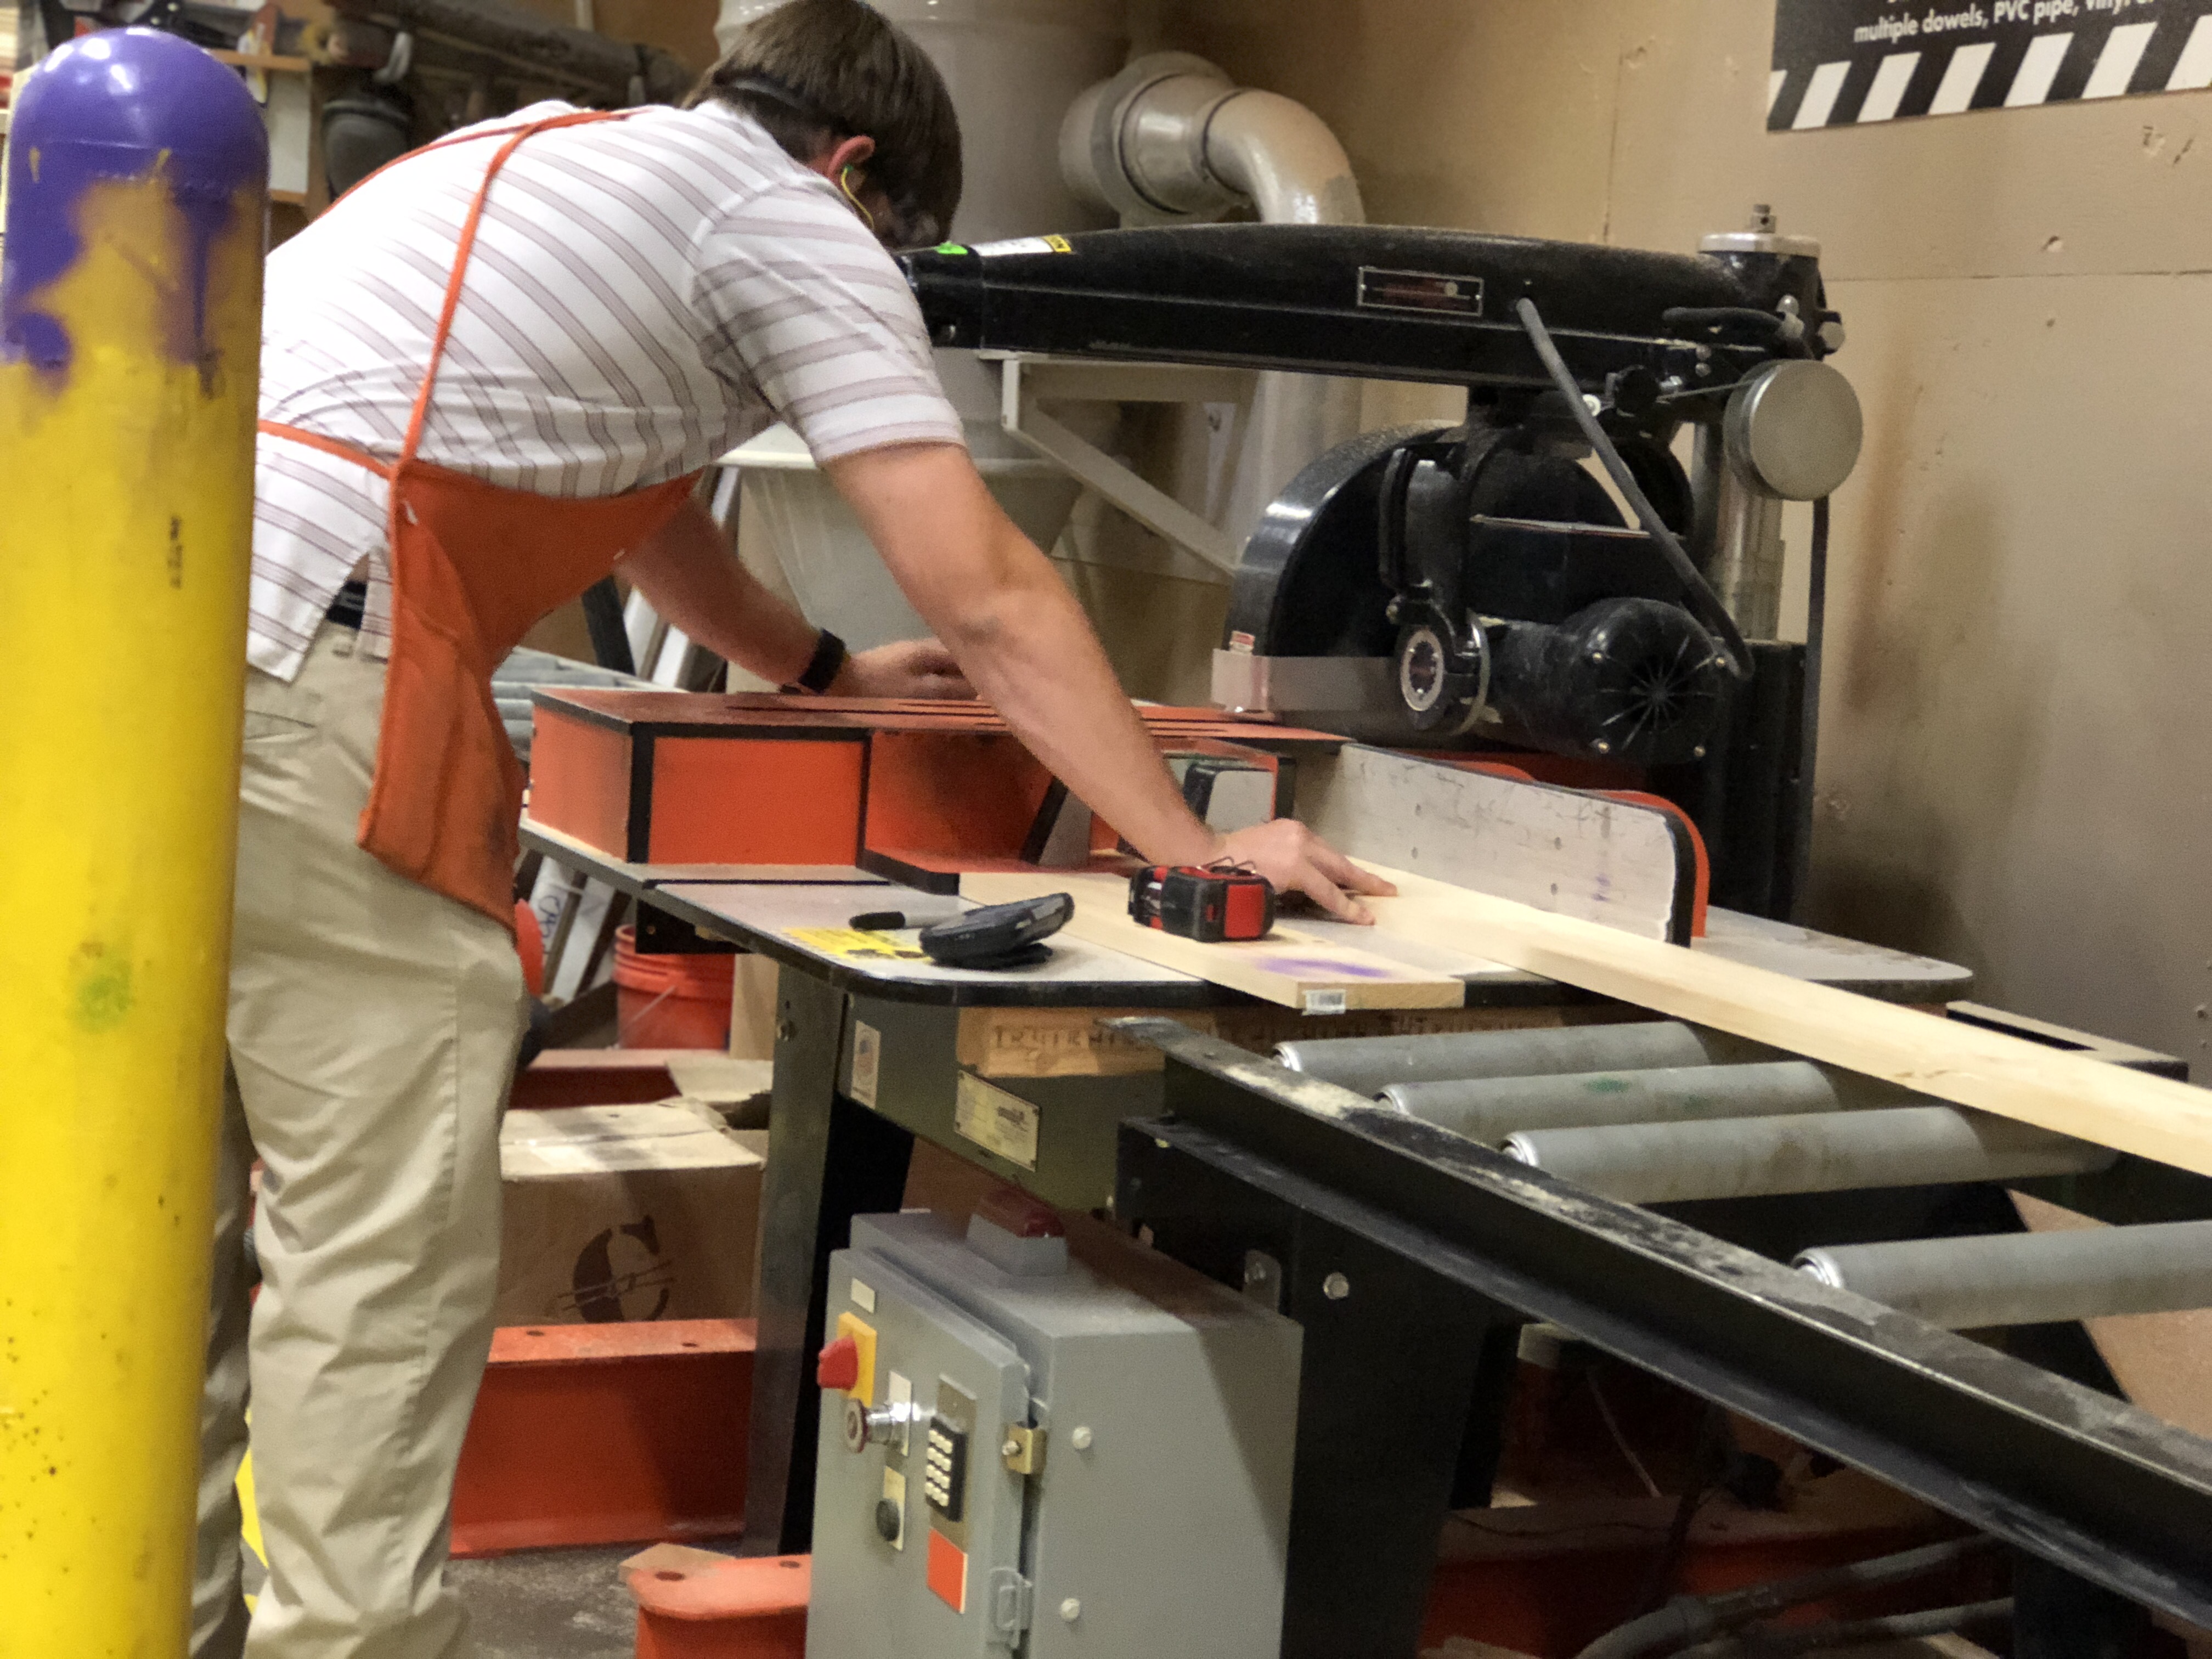
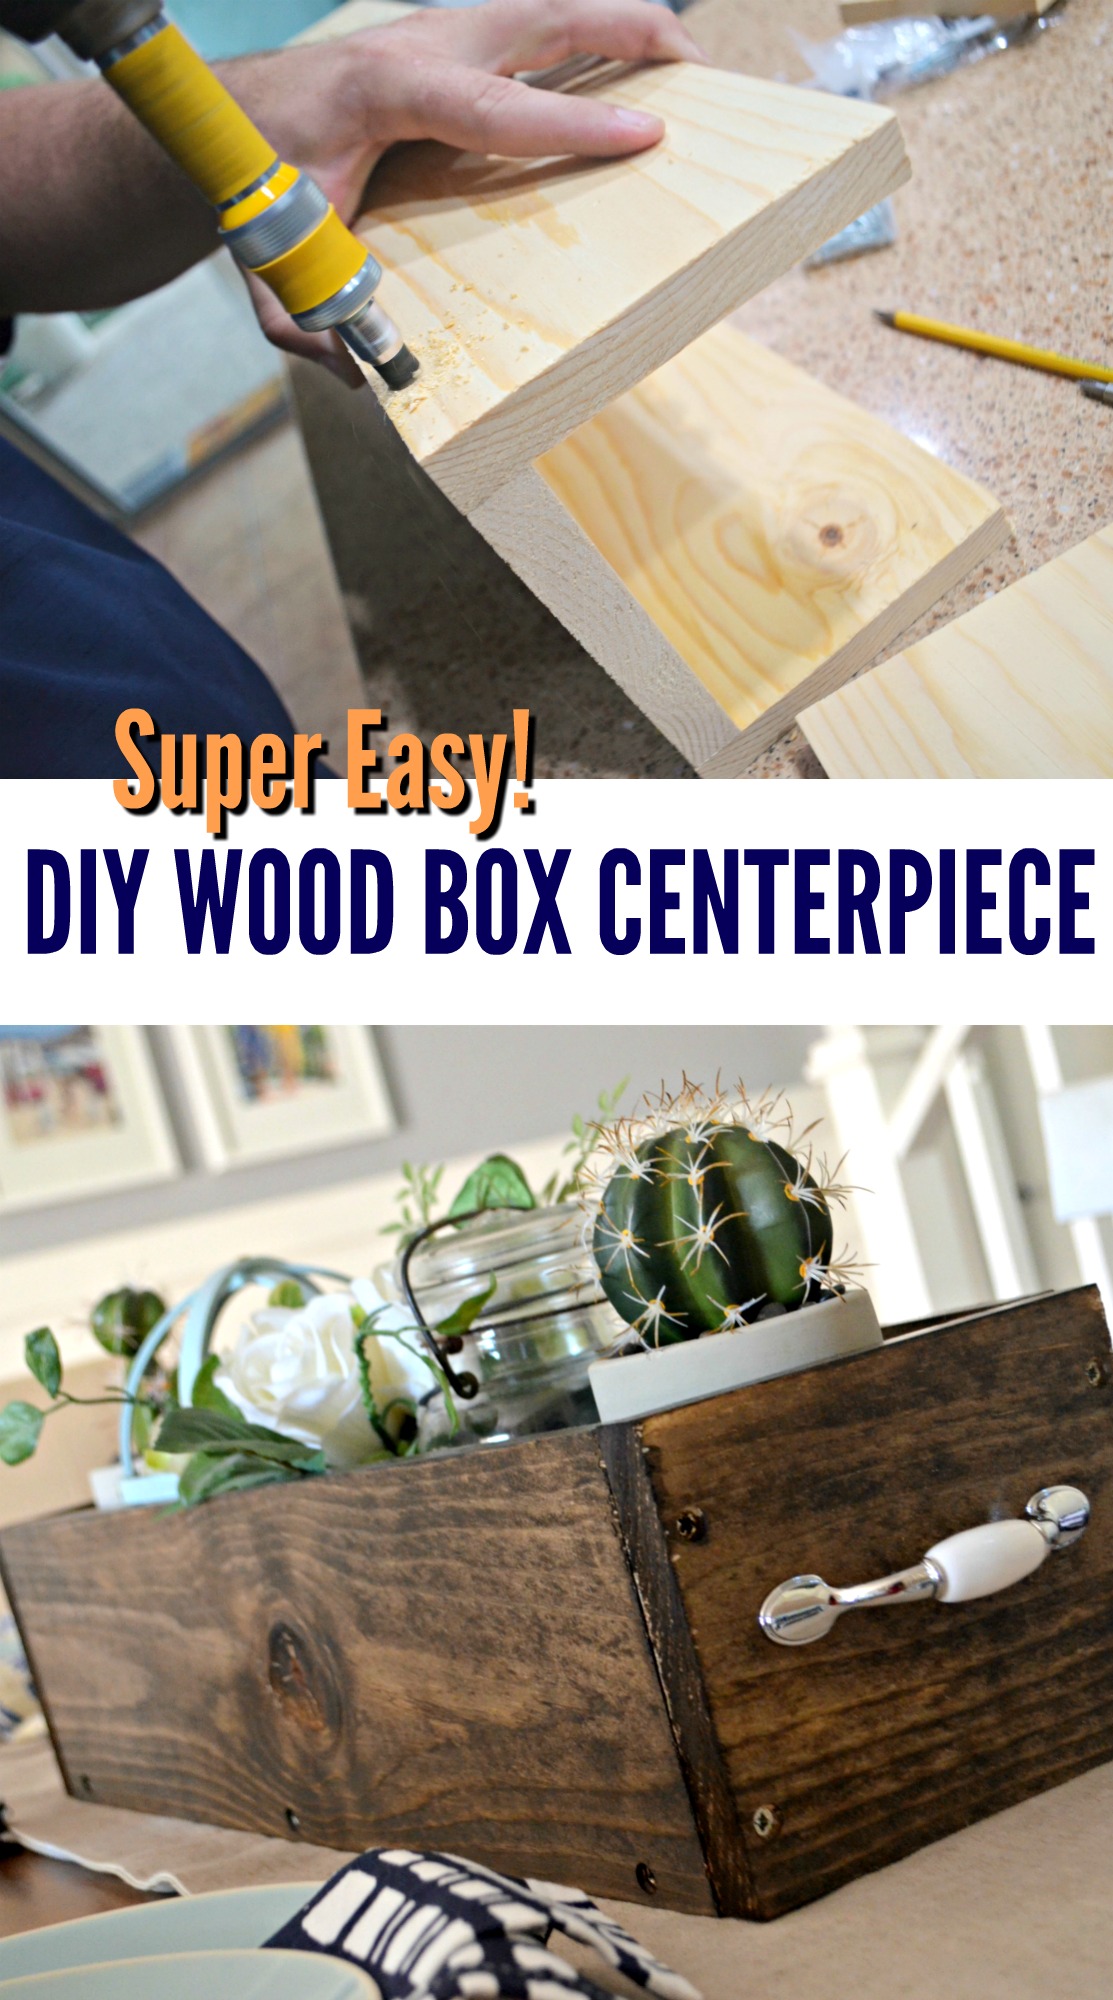
Start with an 8-foot long piece of 1×6 wood.
This is actually a very simple wood project, promise! I started by visiting The Home Depot, and I found a 1×6 piece of pine wood on clearance for less than $5. I picked up two simple drawer pulls for just a few dollars each there, too. Because I already had wood stain and screws at home, this project came in at about $11!
DIY Rustic Farmhouse Wood Box Centerpiece
Supplies Needed:
- 3 pieces cut – 1 x 6 X 22.5″ long
- 2 pieces cut – 1 x 6 X 7″ long
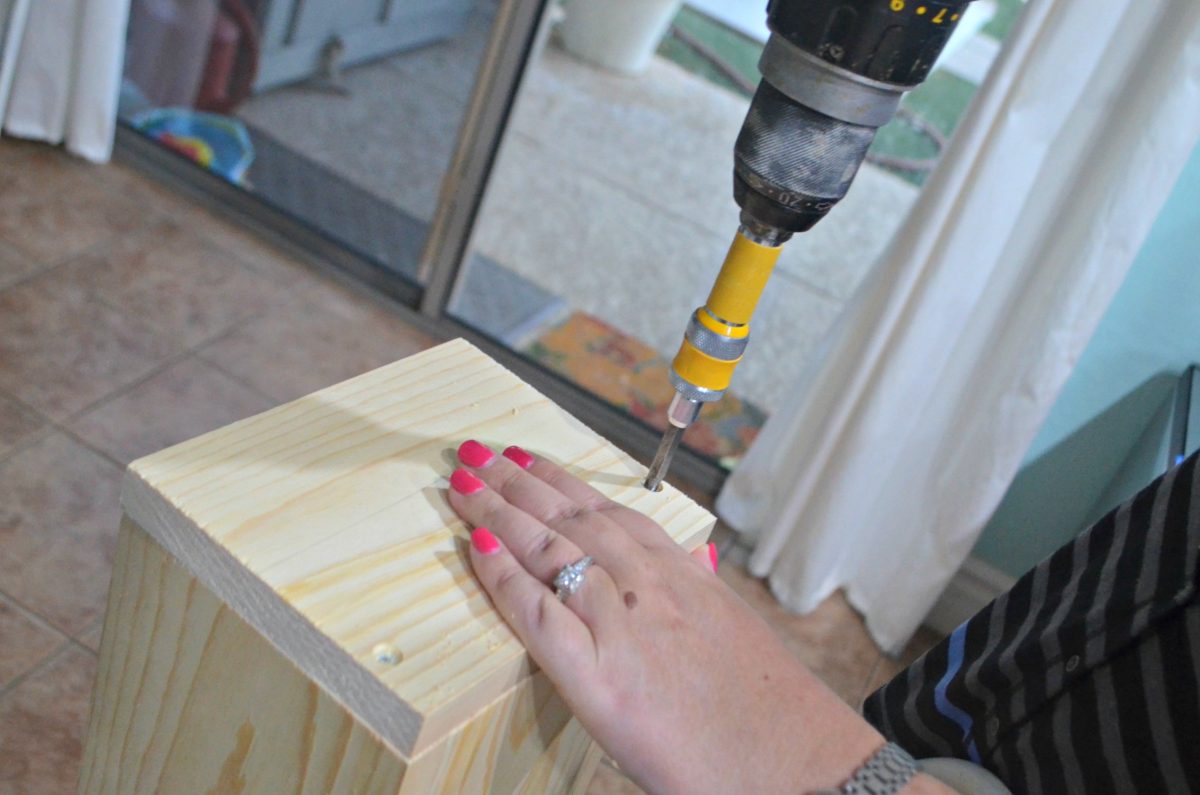
- power drill
- wood screws (We used #8 wood screws 1-1/4”)
- any desired paint or stain
- 2 drawer pulls
Instructions:
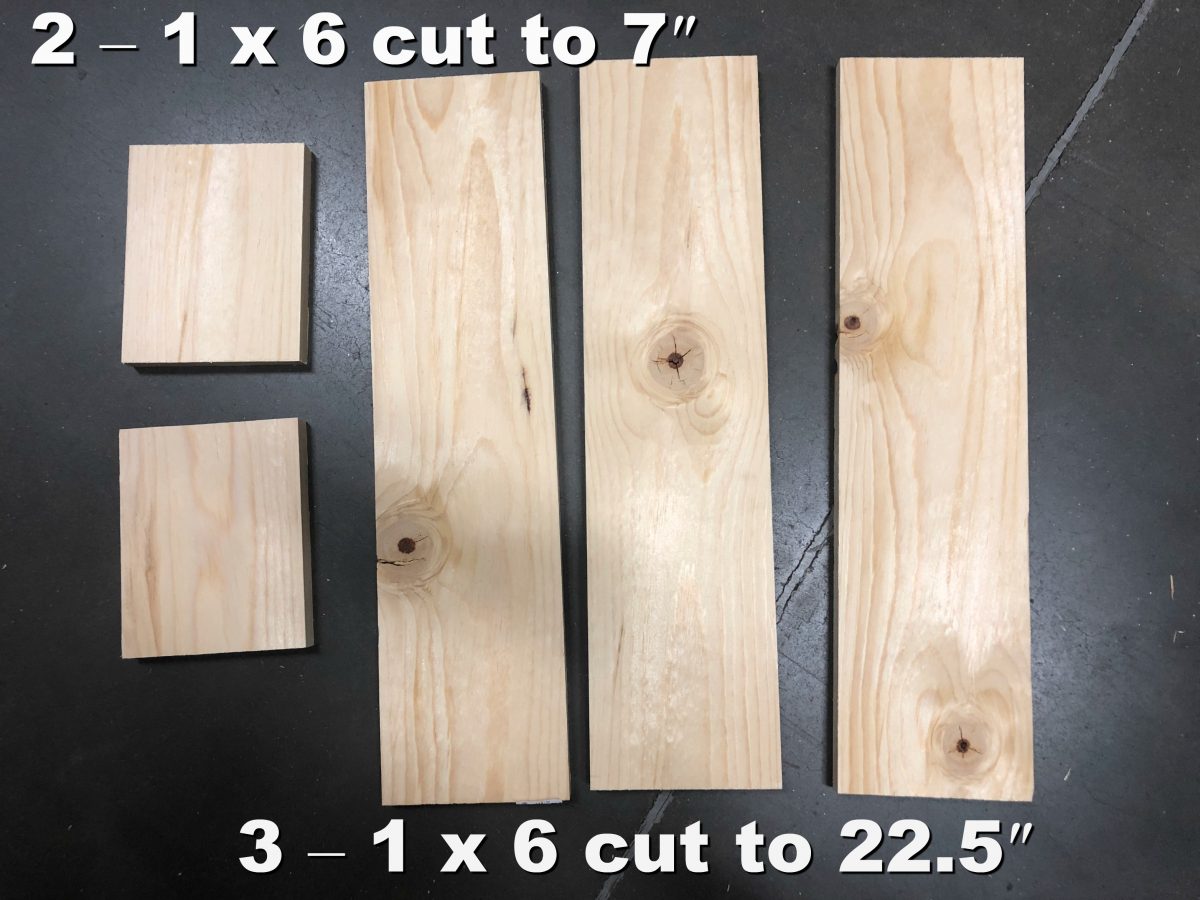
1.) Cut three pieces the same length, followed by two end pieces.
Note: I had them cut at the hardware store, so I didn’t have to at home. While I share my measurements above, you can definitely change those dimensions based on how long you’d like your centerpiece. Before leaving the store, check to see that all of it fits together in case any cuts are off.
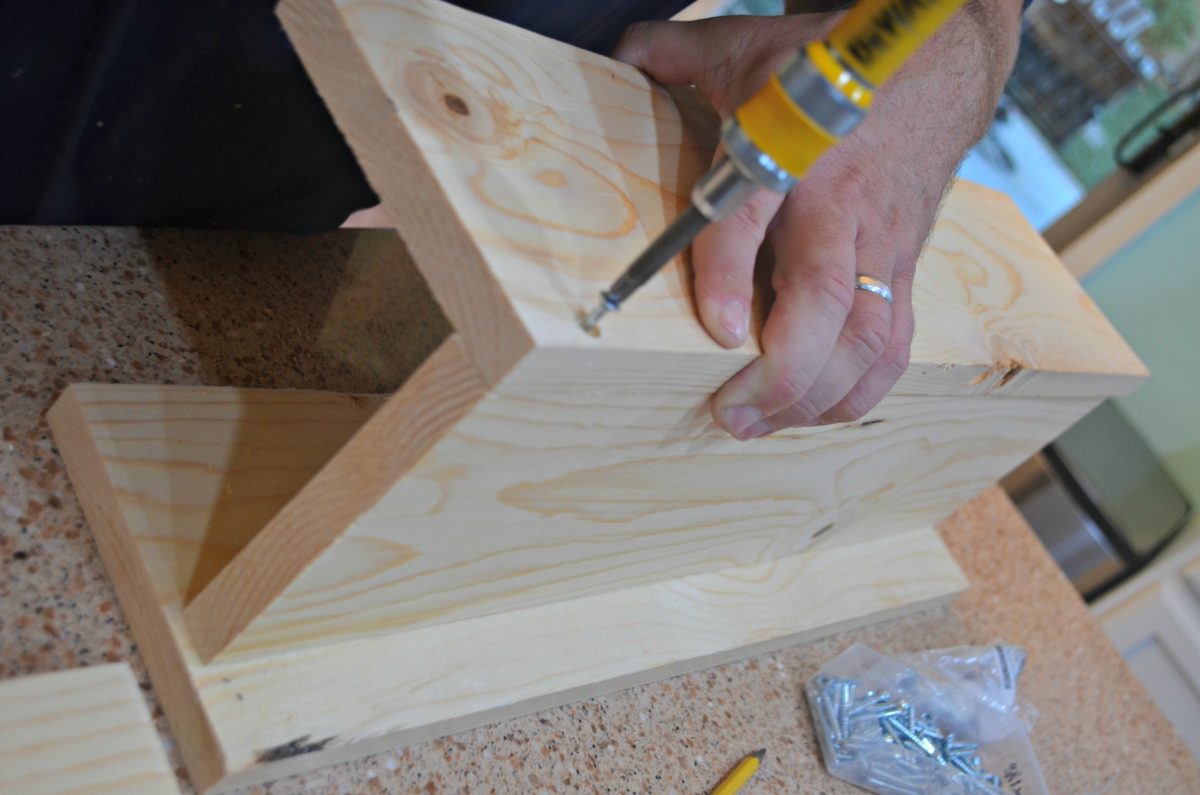
2.) Start screwing the box together with the bottom and one side piece. Pre-drill for the screws, and then add 3 evenly spaced screws on the bottom of both sides of the box.
3.) Once all three sides are screwed together, place the end caps over both sides. Place a screw in each corner.
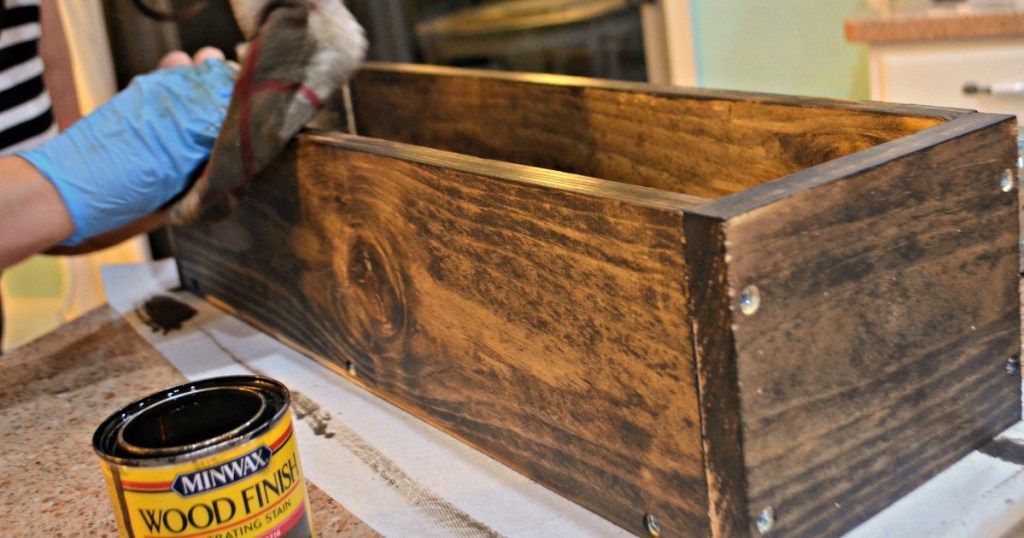
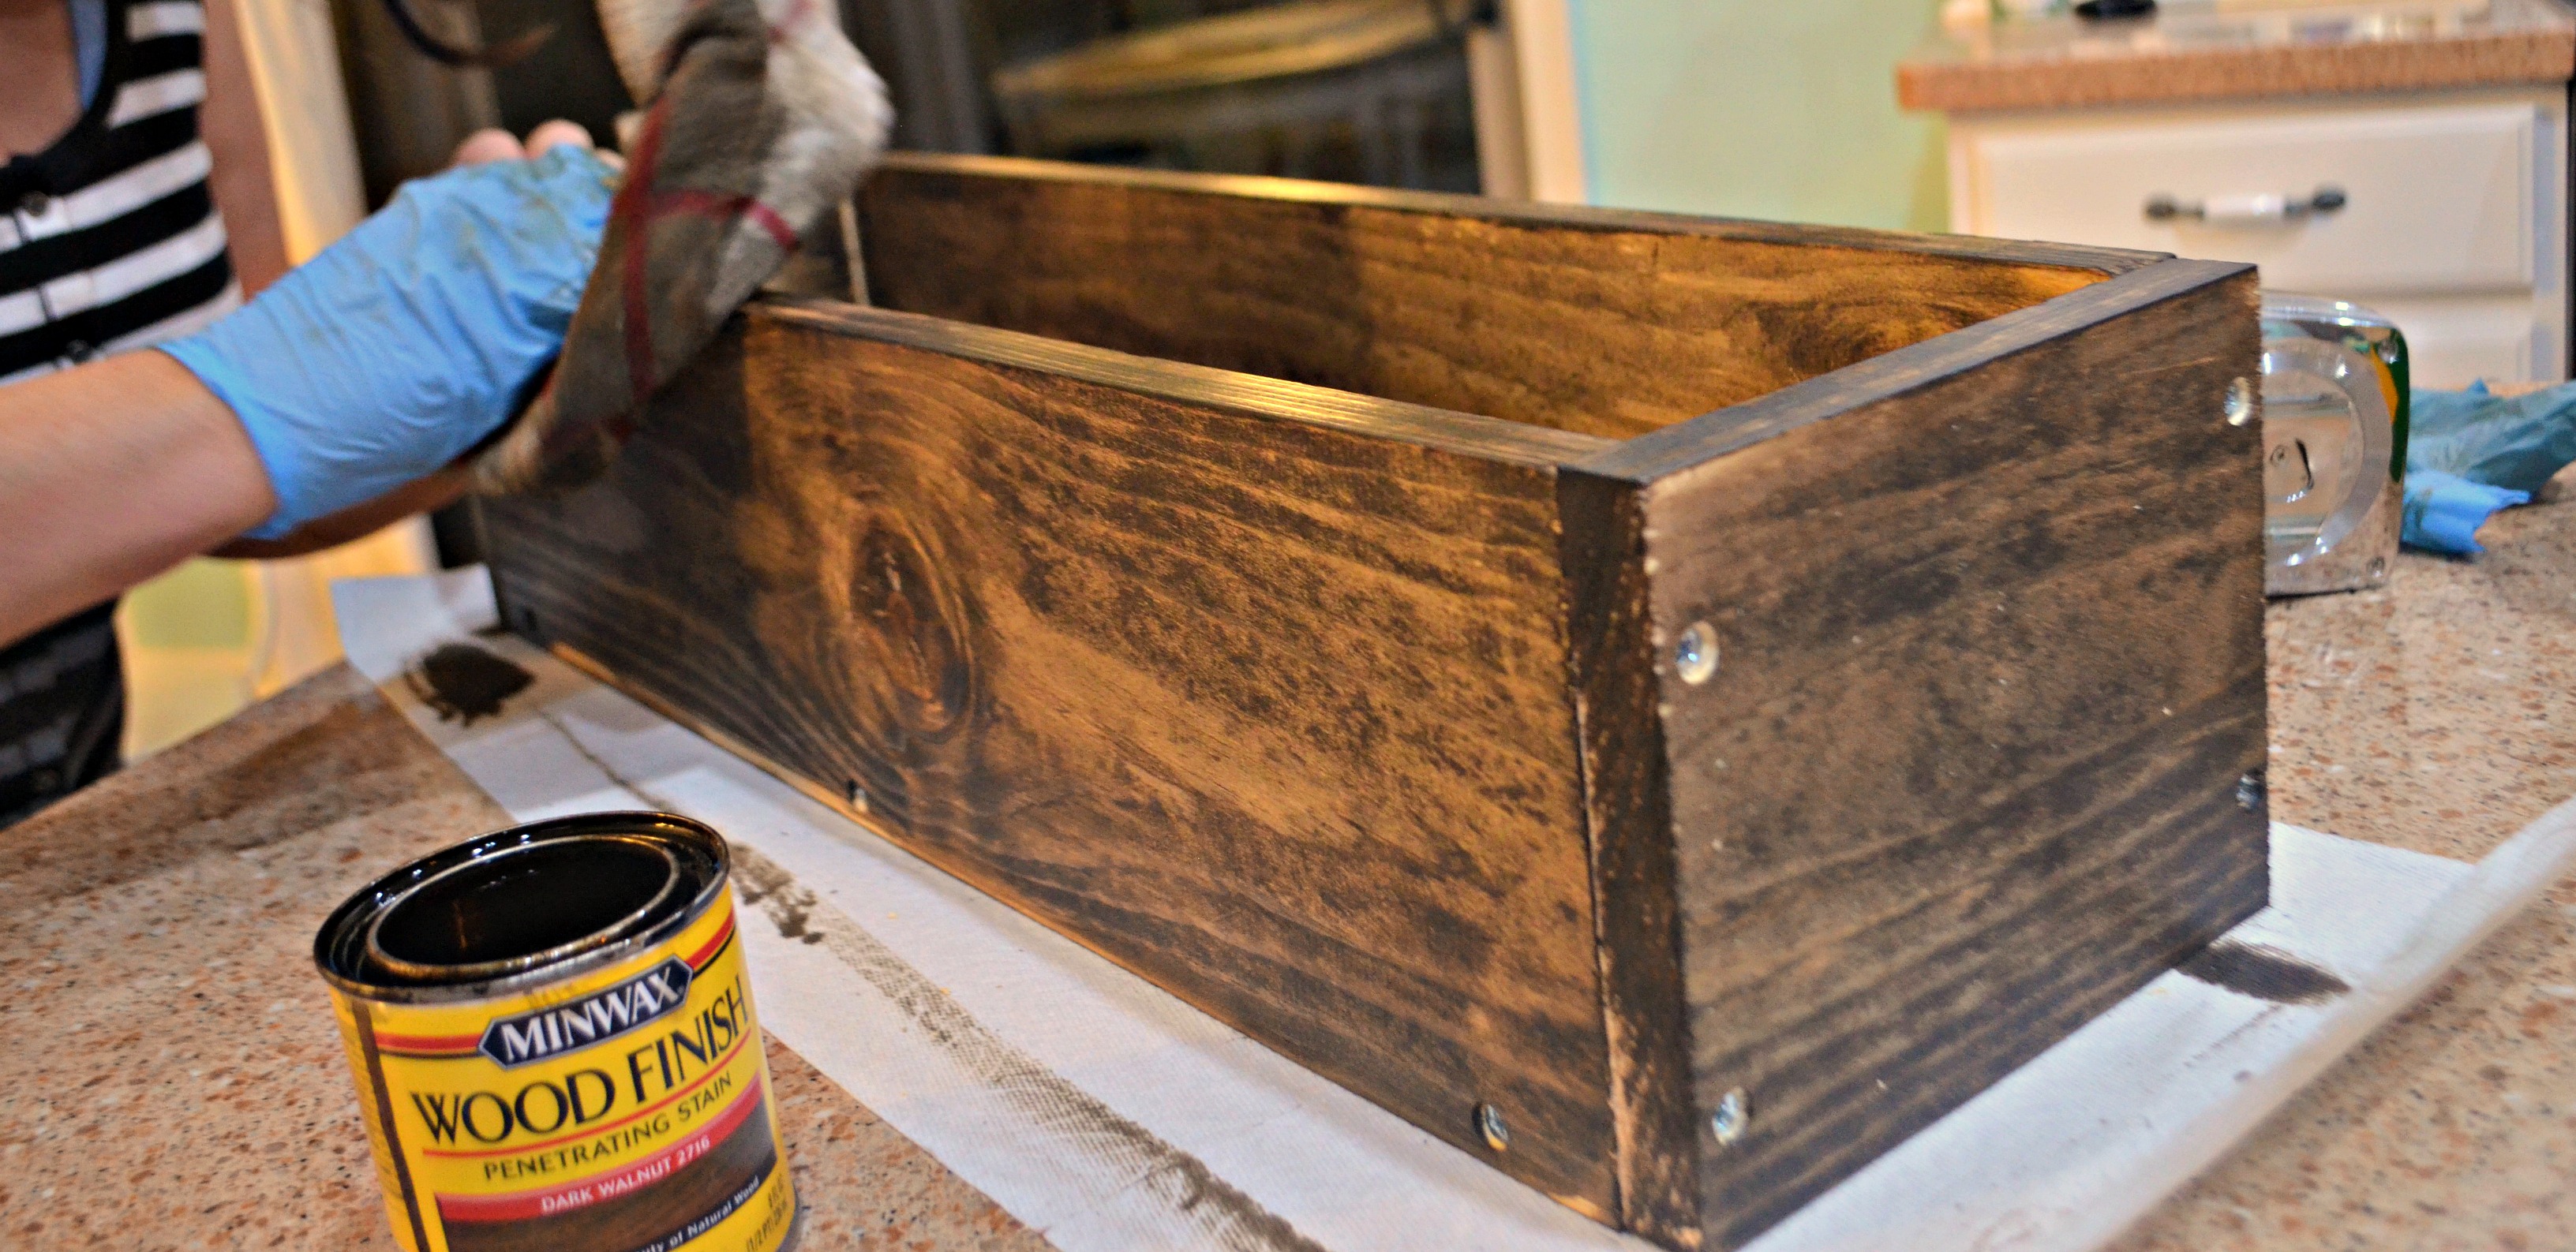 4.) Paint or stain your box as desired. I find it easiest to use a rag to apply the stain. The stain color I’m using is called Dark Walnut by Minwax.
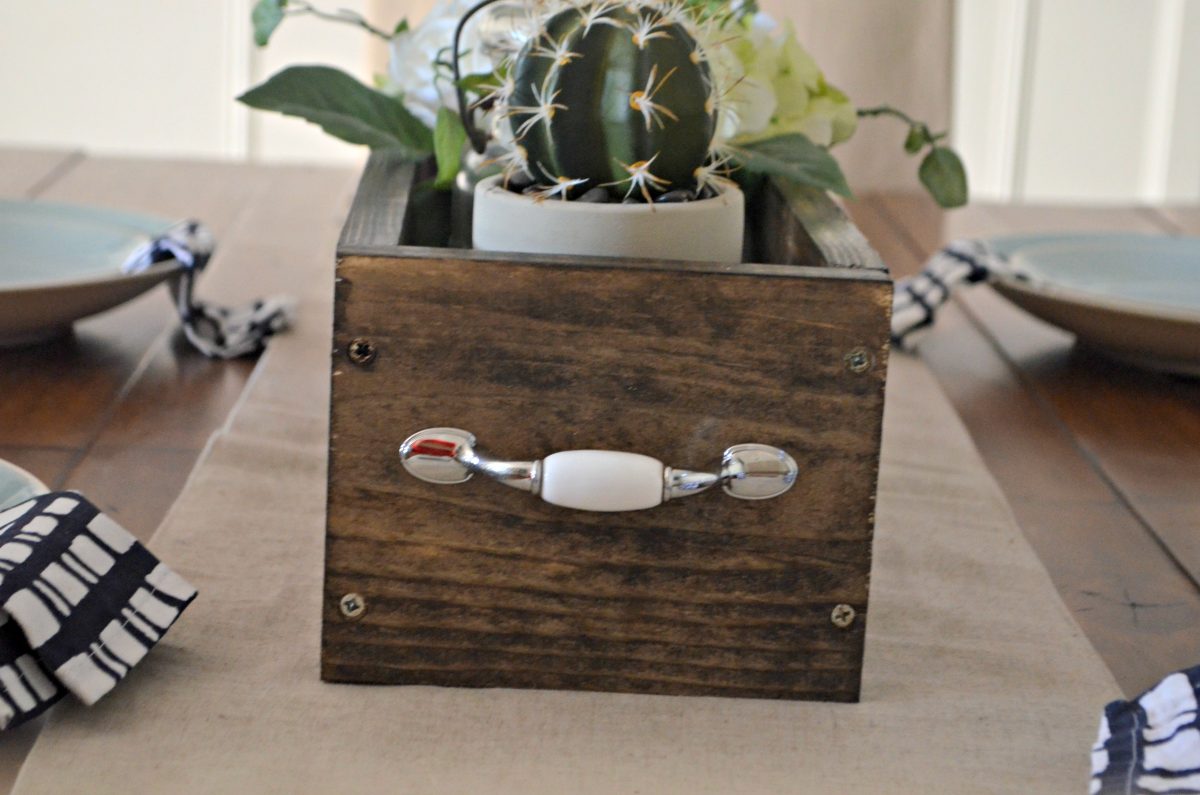
5.) Let dry and add drawer pulls to both ends of the box.
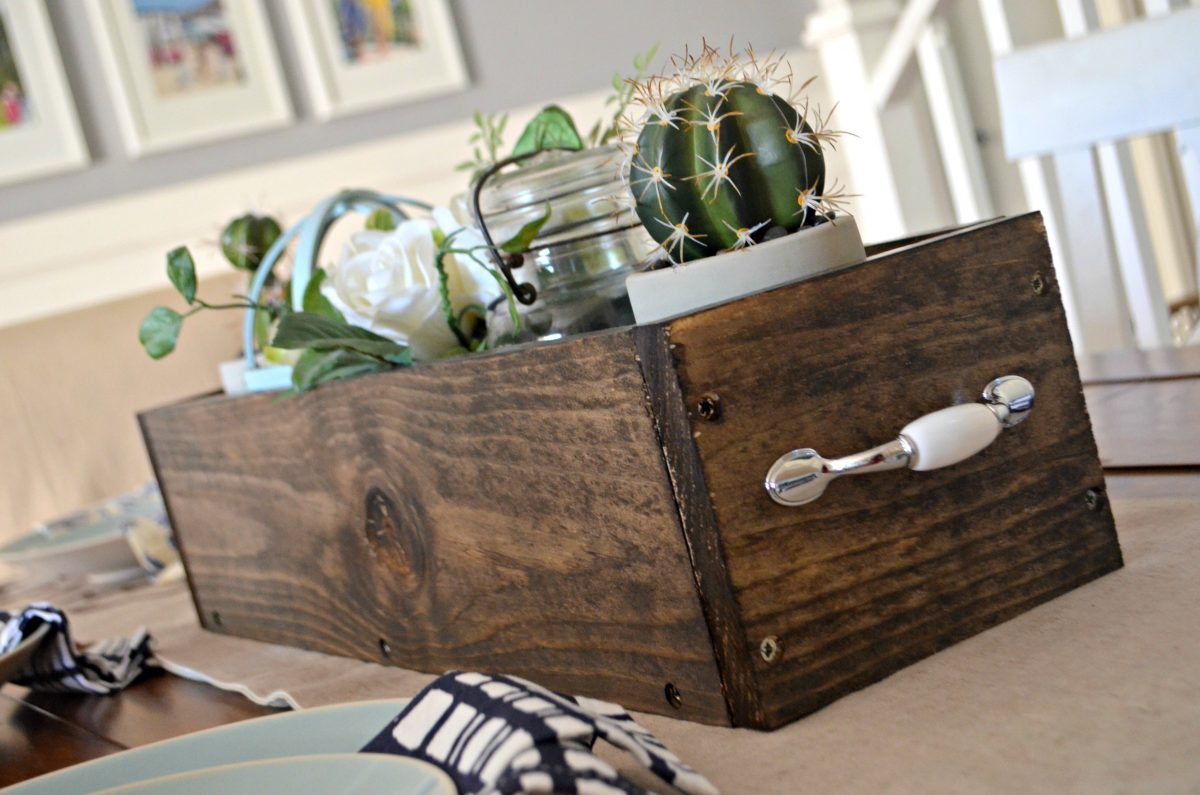
6.) Fill with jars and accessories and proudly display your new centerpiece!
What a pretty centerpiece!
I love that it adds texture and interest to my table, and I can use it year-round by changing out the seasonal accessories. Plus, it’s something special my husband and I put together for our home!

My husband made a bunch of these as planters to line our porch railings. They were really easy to make and so pretty with flowers!
Oh neat – I bet that’s so pretty! Thanks for sharing 😉
Very nice! Thanks for the “I can do it!” Inspiration.
Sure! Have fun 😉
FYI I got a few of these (smaller) for my kitchen window from Michaels for like $4 a piece. Also my husband made these from some rustic looking wood palettes for some flowers for our front porch and it was free 😉
Thanks for sharing!
Love these! I’d add a clear coat after the stain.
Oh great idea! Thanks Liz!
Would this be big enough to hold a few mason jars? Tia!
Oh yes I’d guess four or so depending on size. So fun!
Just a tidbit, my son just got married this past weekend in Cali. His new bride had Superwoman Aunt as her party planner. Her aunt just happened to be tearing down an old wooden fence, so she took parts of the fence and made these exact same looking planter boxes and they were the centerpieces for each table. They looked amazing after she put flowers, moss, filler, etc., in them. So if you happened to be tearing down an old fence (or know of anyone), grab some good pieces and make these using free wood. Wish I could post pics here because they truly were amazing looking.
Superwoman aunt! 🤣I need one!♥️♥️
My hubs made me one of these for our farmhouse table. Wish I could post a pic! I stained it and chalk painted 5 or maybe 6 large mason jars and put babies breath flowers in them. So cute! And you can always swap out the decorations inside for Christmas and other holidays as well.
If you have a Menards near by, they have a section of wood scraps for sale. My husband likes to shop in there for the wood. He made a shelf for our microwave in our kitchen. He stained it and gave it a few coats of polyurethane to seal it up and to give it a shine.
This is good to know! You really do learn something new everyday!
I have something that looks similar but instead I just cut the bottom off a pallet & that’s it! Done & FREEE!
Oh I love that idea!
I made these out of old barn wood for my son’s wedding. We used them as table centerpieces in the building we had the appetizers set up in. They held quart jars with fairy lights and hydrangea heads, in a building made of reclaimed barn wood. Very pretty look for very little money.
That sounds so pretty!
should always prime and stain or paint, whatever you plan to do B4 you put it together. i make and refinish wood furniture. and it saves a lot of hassle if you stain b4. sometimes when you put together and try to stain evenly it is hard to do so with the corners or where the 2 pieces meet. also if you sink the screws you can cover them up if you wish or not. those white areas on the wood that wont stain are areas they filled with a non wood matter. kinda like fillers. they are a bear to work with. if you stain the boards b4 putting it together you could see those then try to do something about it. like if the other side didnt have them, you could reverse sides so the side on the outside wouldnt show the fillers., also if a portion of the wood doesnt respond to the stain like it should, fixing it is easier to do when it is a board alone then a box. especially if you have to sand and redo it.